Capture The Flag (CTF )
Guide written by a beginner for beginners

While beginning my collegiate career I was looking for opportunities to expand my personal life and learn more about digital security.
Digital security branches onto forensics analyst, penetration tester, network security, incident responder and so on. At first it was a little intimidating as the security field is so vast and I couldn’t easily narrow down my interest and figure out a good starting point. CTFing or “Capture The Flag” was an area of interest I decided to explore and used that as my guide in figuring out what my end goal was in terms of security.
Other than the fun that comes from CTFing and breaking into things (legally), you should have an understanding of the importance of security and why all of this stuff seriously matters. As we all know the world heavily depends on technology as we use it for numerous reasons: entertainment, emailing, transferring data, and so on. Along with this presents potential risks in digital security and any private information stored is vulnerable to digital threats which is why it’s important to be alert, know when to take course of action and protect yourself.
One good way to learn how to protect yourself is by doing CTFs which is a tool for people to learn and obtain skills similar to what hackers use in real-life situations and obtain a greater depth of understanding on vulnerabilities. There are two different types of CTF’s, Jeopardy style and Attack-Defense. Jeopardy style is just how the jeopardy game is played out with a board of categories that includes reverse engineering and pwn to forensics and web exploitation. I haven’t participated in any attack-defense challenges so the guide will be focused around jeopardy style CTFs.
I have been incessantly playing in CTFs for the past couple of weeks and during the process I have learned many security tools and vulnerabilities that I will be sharing from a perspective of an absolute beginner and share knowledge that I have found necessary to understand that has helped me succeed thus far. I believe one of the benefits of reading a guide from the viewpoint of a beginner is that I avoid overestimating what the audience actually knows and no process is overlooked (provided with resources) and will try my best to well-equip the reader with the required skills to start CTFing.
When I just started doing CTFs and researched ways to improve, many guides out there cover far too much information that was beyond my comprehension and assumed the beginners level of understanding. This article is not written for a cyber-security mastermind or a leet hacker. The intention of this article is to help you get somewhat more familiar with doing simple CTFs, navigating through the terminal, and so on. This will be done mainly by explaining some of this material based on experience combined with providing links and resources that I’ve found personally helpful.
Disclaimer!! Since there are many categories of CTF challenges out there I will be mainly focusing on reverse engineering primarily because 90% of the CTFs I did and the tools I used are geared towards solving RE challenges and is what I am currently interested in.
Focusing on one category and sticking with it is good practice for improving the special skill set required to attempt those challenges and encourages you to continuously challenge yourself. Something important that I learned during this experience is that you don’t need to become a jack of all trades and feel pressured to know how to solve challenges of every single category. Find one CTF category that you enjoy and stick with it. Branching out happens later as you’re becoming more comfortable with this kind of stuff. With this article I hope that the reader will be prepared to start and do CTFs. This is something that can be intimidating at first for beginners but once you’ve gotten past some of the basics it will get easier from that point.
Seriously, keep at it and you’ll get better.
The “trick” is you have to actually do it yourself.
The Setup

When testing/learning how to use offensive security tools it’s important to set up a safe zone when exploiting vulnerabilities and take certain security precautions into consideration. When building your lab environment it’s recommended you accommodate enough space and resources depending on your goal. Some people use Virtual Machines to develop software for other platforms, test malware or maybe they prefer a certain OS over their host machine’s OS. If you have a virtualizer you can skip this step.
I will be guiding you on installing a VM and provide links for the OS (reason mentioned below). Linux is by far the best Operating System for CTFing, programming and testing software. It provides the user with a lot of flexibility and freedom to do what they please. The Linux platform also has many useful tools available for the user that can be installed through the terminal. Honestly, I just feel better when I program on Linux and programming feels easier — Just my opinion though.
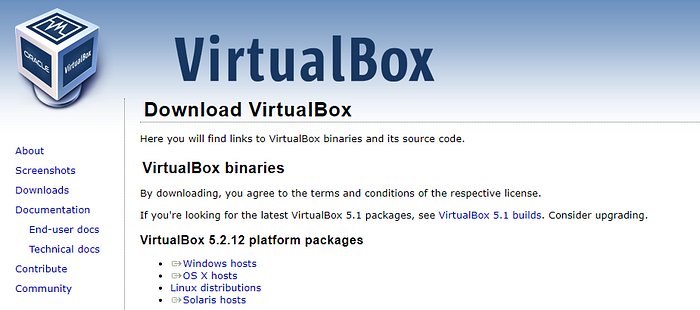
You can choose any lab, (Oracle VirtualBox, VMware Workstation, VMware Fusion..), personally use VirtualBox. Follow this link to begin the installation process. https://www.virtualbox.org/wiki/Downloads
Once you’re at a page that looks like this, download the package based on the OS running on your host machine. Once the installation wizard pops up, leave the default options checked (unless you want to update your file path) and continue to hit next. After you completed the process and exit the installation wizard, you should now have the VirtualBox Manager up and running.
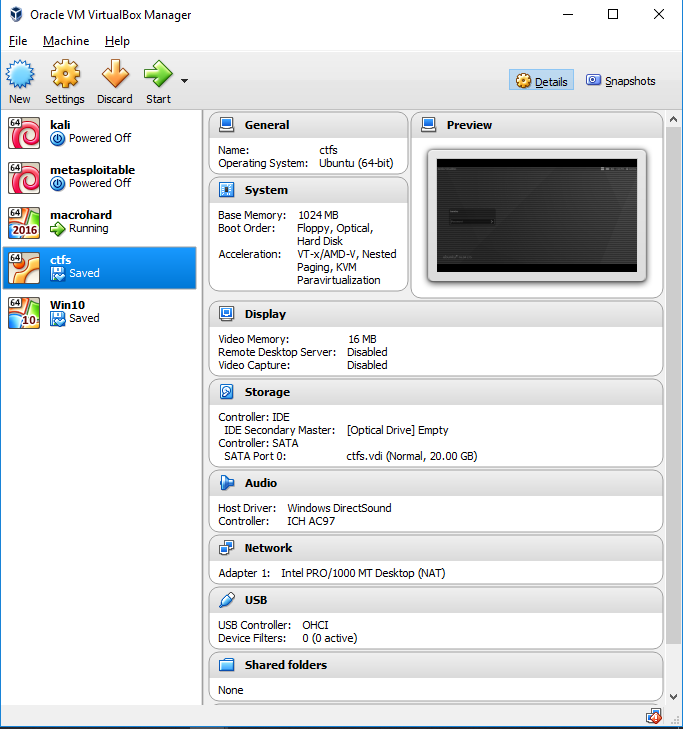
If not, locate which path the files have been stored and open the application. (Note: on the left panel I have multiple workstations, if you just installed this it should be empty.). Now that you have your virtualizer installed, leave the manager open as you are going to have to install the Linux OS to attach to your new VM. Navigate to this website —
https://www.ubuntu.com/download/desktop?
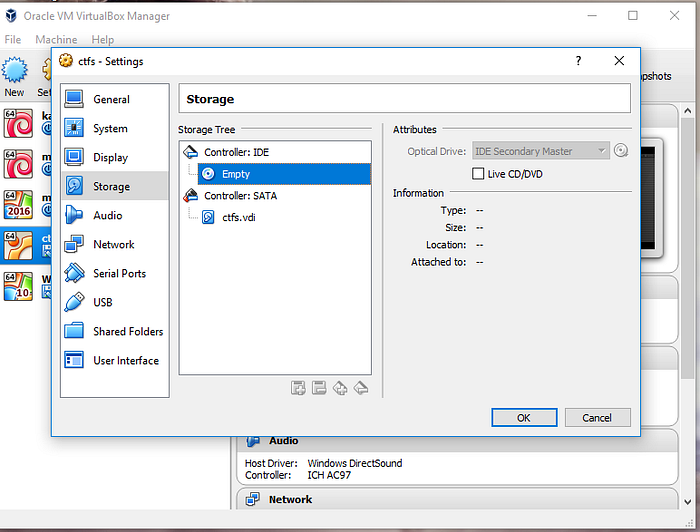
You can install the latest version, 18.04 LTS ISO, I am currently running an outdated version, 16.04, but either will be fine. An ISO disk is what you will attach to your VM (image below) by replacing the “empty” drive and what holds the OS.
Considering that I’m striving for brevity and efficiency with this guide and shortening areas that are not directly related to CTFs, I just demonstrated the processes of instructing and installing a virtualizer as it’s a fast operation, setting up the OS requires a few more steps in which I HIGHLY recommend you check out this link and completing the required steps before moving on —
Know Your Terminal
Before GUI (Graphical User Interface) was a thing, users had to navigate, manipulate and access files through the terminal by memorizing countless commands. However, there are still advantages to using the terminal over GUIs that is beneficial towards both the software and security sides of things.
Operations and process can be much faster to do through the terminal: unzipping or compressing files, finding information on files, installing software or security tools and applying them, writing bash scripts (Bash is a scripting language and is run on Linux), and the list goes on. Knowing how to use the terminal also avoids having to re-learn tools and services on GUI’s as they are continuously getting updated.
You are going to be solving CTF challenges using the terminal 90% of the time so in order to actually improve on doing CTFs or anything security related you have to actually sit down and familiarize yourself with the basic commands of using and navigating through your terminal. This will make the learning process tremendously easier allowing you to directly focus on what’s going on during the challenge. You’ll save yourself plenty of time, get through challenges faster and as a result learn more which is why before you continue on with this guide I highly recommend you visit this website and review the command line crash course—
“Shut Up and Shell” — Zed Shaw
Go-To Commands When CTFing
For every challenge I start I’m either using one or all of these commands in the terminal from the start in learning more about the executable/file and trying to extract as much information as I can.
bambu@tacos:~$ chmod +x <filename> (change permission)
bambu@tacos:~$ ./<filename>        (run file)
bambu@tacos:~$ file ./filename     (view file contents)
bambu@tacos:~$ strings <filename>  (static analysis)
I will be explaining what each of these commands mean, and give examples of each execution so you can get the general idea of their purpose. During the reading, try to replicate what I am showing you on your own so the next time you start a challenge using these commands will come naturally to you.
You can find most of the CTFs that I use for demonstrative purposes at —
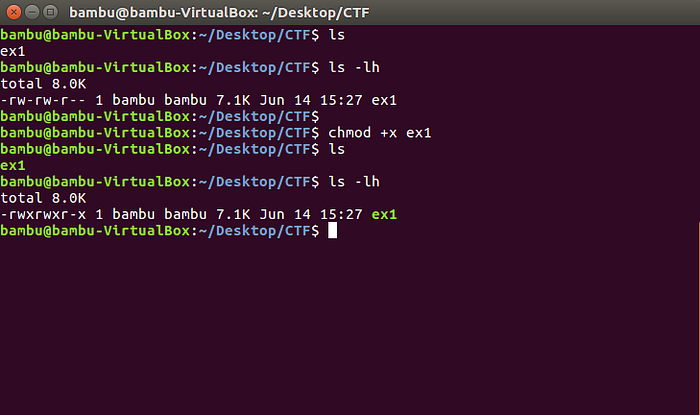
What I have here is an example CTF challenge (ex1). (Note: considering I provided the resources for you to learn basic terminal commands, I am going to assume you know what “ls” is.). Notice when we type in the command line(ls -lh) we are able to see the permissions of this file. Rwx means (r: read, w: write, x: execute), if there is a “-” that means the user doesn’t have permission to do either of the following. The permissions are broken into groups of three, giving permissions (in this order) to Owner, Group, and World. If we would like to execute this file we would have to use a command called “chmod” and the “+x” that converts that file into an executable. If you notice after, if we type “ls -lh” we are able to see “x” in each of the following groups. For additional information on chmod and what you can do with it, type into the terminal “man chmod” and you’ll be directed to chmod’s manual page. A neat thing to notice is that the file will be highlighted in green once you changed the file permissions(refer to image).
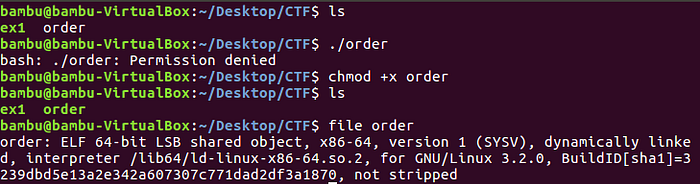
In this example, when we try to run the file “order” it says
bash: ./order: Permission deniedWe know how to fix this, simple chmod +x command. Before we start running this file, another helpful command is “file <filename>”, it will tell us which format this file is written in, the instruction set and whether it’s a 32-bit or 64-bit file. In our example, the file is a 64-bit ELF using x86 instruction set. If it was a 32-bit file we would have to “sudo apt-get install gcc-multilib” in order to execute it (Note: Windows subsystem doesn’t support gcc-multilib, run 32-bit on a VM). Using the file command can tell us other information such as if the file is and how it was compressed, if it’s an image file or ASCII file and so on.
Now let’s run the program.
Type in the command “./order” and you should see something like this:
bambu@tacos:~$ ./order
Enter password:
AAAAAAAAAAAAAAAAAAA                                                Wrong password length.                                                             bambu@tacos:~$
Another command to know is “strings <filename>”, it shows what text can be extracted from the file and is a great tool for doing static analysis. When typed the output appears as such…
bambu@tacos:~$ strings order
/lib64/ld-linux-x86-64.so.2                                                        :.4*`s                                                                             libc.so.6                                                                         exit                                                                               __isoc99_scanf                                                                     puts                                                                               printf                                                                             ....
If you want to specify what gets outputted you can check out the man page for strings, “man strings”. Sometimes the flag will be given by simply using the strings command or maybe there will be a string in base64 that you could use the terminal to decode for you. You can detect if the string is in base64 when the ending character is an “=” such as “CBwbGVhc3VyZS4=”. This comes up often when doing CTFs and using these commands to decode will come in handy. (shown below)
bambu@tacos:~$ echo <value> | base64 -d I highly recommend you familiarize yourself with Piping “|” and grep. Piping is a redirection tool that you can use to combine commands into one line (as shown in base64 decode example) and grep(extremely powerful) that’s used mainly to help with searching and filtering.
Applications and Tools
A must have when doing reverse engineering is a debugger/disassembler(IDA,Immunity, etc.). Stepping through the disassembled code and tracing through it can show what exactly is going on in each step and help in figuring out how to break into the program (the code will be broken down in assembly code). Deciding which debugger/disassembler to use and why depends on the user and your level of experience. This website gives you the list of debuggers to choose from and compares the differences among them — https://ctf101.org/reverse-engineering/what-are-disassemblers/#disassemblers
Assembly Resources
To get better at reading through assembly code and using the mentioned RE tools, HackUCF has an excellent crash course video that explains what registers are and certain operations — https://www.youtube.com/watch?v=75gBFiFtAb8
More examples using source code to assembly —
https://ctf101.org/reverse-engineering/what-is-assembly-machine-code/
In order to get better at reading assembly and using debuggers you have to actually start applying your skills and practicing this stuff than just reading about them.One offline CTF that I’ve been playing on is https://microcorruption.com/
It’s one of the best CTFs for starters that’s designed to improve specifically your RE skills and help you build skills such as reading assembly, doing static analysis, and corrupting memory. I’ll be using one of the challenges from microcorruption as an example of a stack buffer overflow.
Stack Buffer Overflow Run-through
One of the most common vulnerabilities you’ll find is a Stack Buffer Overflow. Essentially the developer has created a program and hasn’t took into consideration all the possible inputs into a buffer and when the user has control over that input they have the power to input a size beyond the buffer’s bound and crash the program.
Here’s a small C program to demonstrate this.
void overflow(char *buffer)
{
 char local_buffer[50]; //49 char(+ null byte to terminate string)
 strcpy(local_buffer,buffer); // will copy until it hits null byte. }main (int argc, char **argv)
{
 overflow(argv[1]);
}
The user’s input will be stored in argv[1] and then that string gets passed to a function called overflow. In the function overflow(), it creates a local buffer and stores that string into that local buffer. Note that the buffer size is 50, all the user would have to do in order to crash the program is to input a string larger than 50.
Microcorruption has a challenge called Cusco that demonstrates this through assembly.
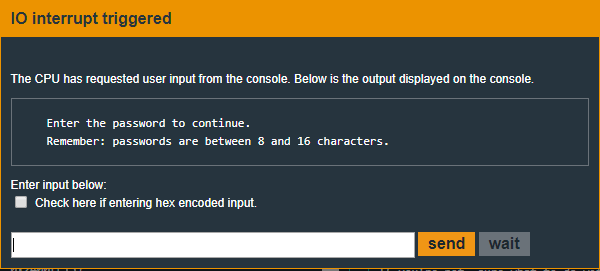
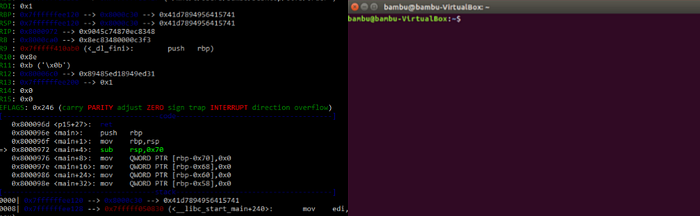
The user is prompted to enter a password with a fixed size.(Note: Intel platform stores numbers in little endian format in which the LSB — “Least Significant Byte”comes first. Mentioned in resource from video link.). I entered a test password “FFFFFFFFFF” and traced through the debugger to see what’s going on.
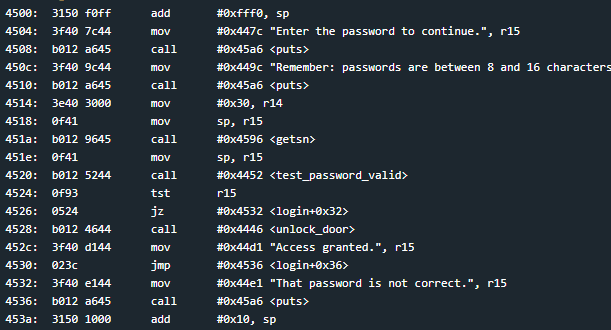
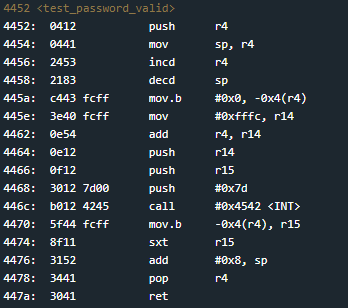
In the main function it makes a call to <login> and from the login function it calls <test_password_valid> and essentially the function would return the value stored in r15 and test to see if that value is 0 with the jz command(4526) and if so would fail the password test. After hours of trying to manipulate the password so that the value in r15 doesn’t become zero, I just assumed that I had no control of what value r15 holds when that operation was taking place so I decided to take a different approach and try to enter a long password to cause an overflow. Note that the call to <unlock_door> in <login> has the address of #0x4466 and converting that value from hex to ASCII 44 66 => D F. After many trials of manipulating the input so that the return address will match <unlock_door>, I got the solution by typing 16 F’s with FD at the end and it unlocked the door! As mentioned before, following the instruction set we reverse the order since it’s little endian which is why at the end of the string DF was in reverse.
Where and When + Additional Resources
There is usually a CTF going on at least twice a week and you can participate wherever you are (depending on whose hosting the CTF). The website below is commonly used by “CTFers” in staying up to date with all the CTFs that are going on around the world. After every CTF people will sometimes upload write-ups to this website that basically goes through the process and explains how they solved a particular challenge.
Some additional resources that that go in-depth on many other CTF categories and worth checking out.
https://trailofbits.github.io/ctf/intro/
http://captf.com/practice-ctf/
Selected these specific resources as I refer to them as I am CTFing and found them helpful in times of need.
Thanks for reading! :)
Twitter: https://twitter.com/_saladham
Website: http://saladham.com

