How to make a simple, beautiful website in less than 45 minutes
That includes reading this guide. I’m legit.

I’ve been making websites before responsive design even existed, and the only WYSIWYG builder around was Homestead’s early 2000s monstrosity.
Website creation has come a long way since then, and with CSS frameworks like Bootstrap, it’s more accessible than ever before.
Let’s be real though: It’s still not accessible enough for plenty of small businesses who just need a beautiful online space for their brand.
Furthermore, the state of WYSIWYG editors is absolutely apocalyptic.
Worse than that, plenty of small businesses already have hosting for their outdated websites, and switching to a new platform can be rough.
Probably the part that concerns me most is knowing 99% of them will spring for WordPress, when they don’t actually need it.
For your reference, I’ve used:
B12, Bubble, Weblium, WordPress, Elementor for WordPress, Boldgrid for WordPress, Mobirise, Weebly, Wix, Squarespace, The Nightmare That Is WPBakery, Bookmark, Assembly, Hubspot, Huula, Grav, Ghost, Laravel, Drupal, TextPattern, Leia, and more…
And only 3 of the above do all of the following:
- Make it simple.
- Make it responsive out of the box, and keep it that way.
- Don’t have a shitty WYSIWYG editor.
- And most importantly: They don’t get in your way if you need to tweak something by hand.
I’ll give you a hint: None of them are WordPress, nor charge monthly fees.
For cash-strapped, busy small businesses that need a nice website, what‘s the solution?
I’m going to help you get there. Stay with me.

I’m going to outline how to build a simple, beautiful responsive website in less than 45 minutes.
Be warned: there will be a tiny amount of code to learn. But I’ll outline exactly what it is, what it does, and how to work with it.
Here’s what you need to get started:
- Notepad++ (It’s free).
- Google Chrome, and enable Developer Tools.
- $24 in your bank account.
- Assembly (It’s $24. I’m not affiliated with them and make no money advertising this product.)
- WAMP. (It’s free, and not as complex as it looks.)
- A web host that allows ftp / direct upload.
- 45 minutes to spare.
- Some copy written, or a logo, or pictures, or literally anything.
Are you ready? Let’s begin.
Step 1: Get everything you need together.

- Install Notepad++. Pin it to your task bar.
- Make sure Google Chrome has developer tools on, because you’ll need to change a few things and this lets you see what you’re doing in-browser.
- Download WAMP. Don’t freak out about it right now.
- Grab Assembly. If you just want to read this guide for now to see how it works, that’s fine.
- Install WAMP. It installs like any other program.
- Launch WAMP, and read below.
Step 2: Here’s where it gets a little complicated.
WAMP is a little bit confusing. You got this, though.
WAMP should be set up in the tiny little up-arrow-taskbar-thing on Windows.
You’re going to want to click it, and you’re going to feel overwhelmed.
Don’t! You’ll be okay — I’m here to help.
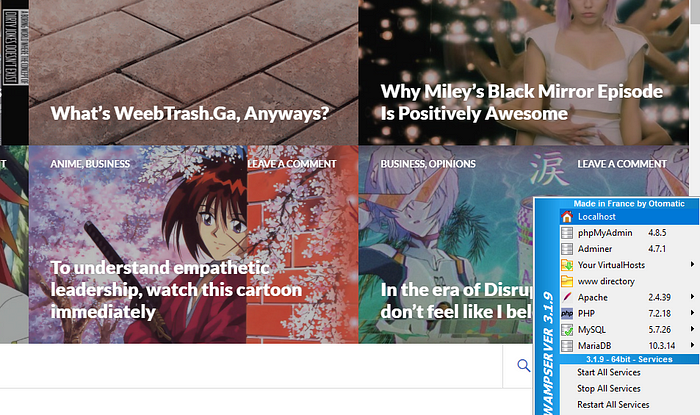
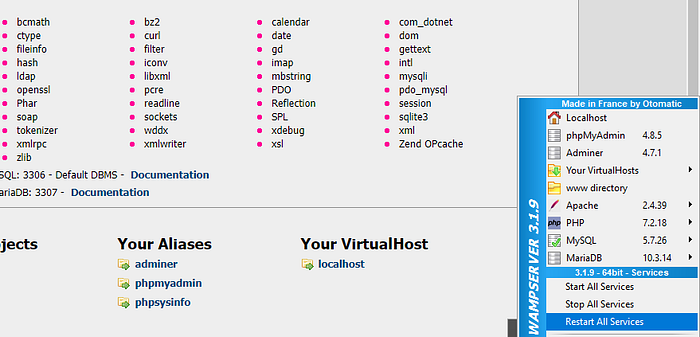
Click on the option that says Localhost. It will open up a page like this:

Notice how I already have an Assembly project set up.
Now, you’re probably wondering how you get your own little folder for Assembly in here.
It’s pretty simple:
1 — Download Assembly.
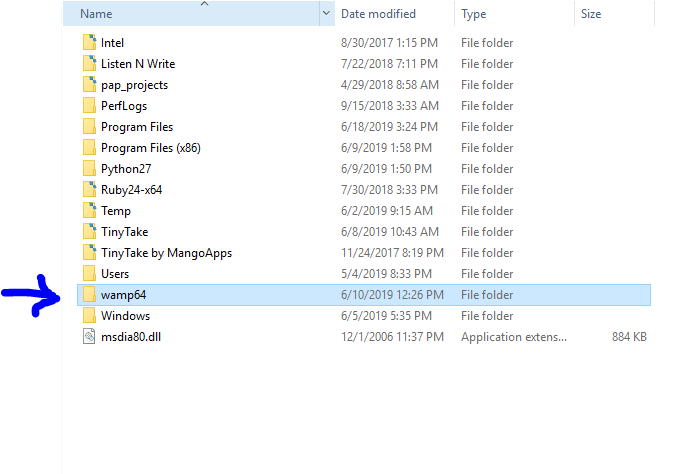
2 — Extract the Assembly folder to where you installed WAMP, in the WWW directory.
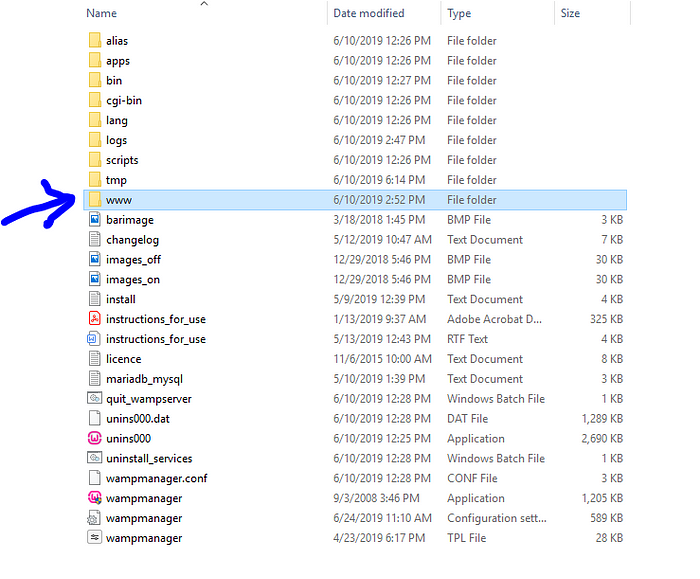
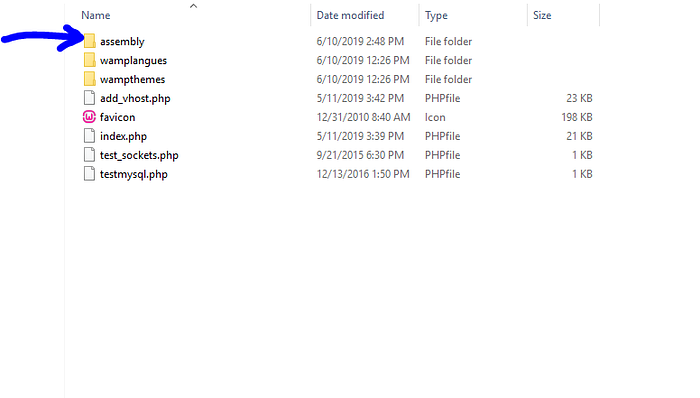
3 — Name it assembly, so it’s easy to remember.
4 — Restart your WAMP Server.
5 — Visit http://localhost/assembly/
6 — You’re all set to start building a beautiful website!
Step 3: Start tinkering with Assembly
Let’s check out all the things Assembly can do.

Click the link shown in the above image. You’ll be taken to this screen:

It’s time to start building your website.

How do I start adding components?
And what are they?
You can choose your header shown in the above section in the screenshot.
You can also pick other elements, like:
Content blocks:

A showcase for your agency’s projects, or your small businesses’ products:

Or a pricing table for your services:

Make sure to put in a navigation menu at the top, and a footer.

What if I messed up and want to delete a block?
Or move it around on the builder?
You can easily move them around or delete them.

Click the three little dots to pull up another menu, so you can remove a block, or move it around.

I’m stuck…what if I don’t know what to make?
If you’re having trouble with inspiration, why not look at some demos?
Click the little house-looking icon near the bottom left:

Here you can click the images to pull up some demos the Assembly team made. This shows you different configurations you can make.
How can I make multiple pages for my website?
Click the little ‘paper’ icon to the left.

You can design multiple pages for your website from here!
What if I want to change the colors of my components?
Assembly makes it easy.

Click the paint roller icon to the left. This will set your builder into ‘Design Mode’.
To change the background overlay of the header, like I did above, click the little circle:

You can change the opacity of the overlay color, and also the color itself.
Pretty neat, huh?
What if I want to change the fonts?

Click an item that has actual text in it.
Here you can set the font, change the properties of the font, like the weight or the letter spacing, and even set Global Font parameters:

What if I want to change around the images?
And what if I want to change the text?

You can change the project images no problem.
But the rest of it? That’s where it gets tricky, and where the coding part comes in.
Assembly was built to rapidly develop websites with pre-made, well-coded blocks that are easy to customize.
Assembly assumes you know a bit of code to work with it, which might not be true at all.
Let me help you change some things around with Notepad++.
But first…
Step 4: Export your Assembly website

Once you’re all set with all your components, font changes, color changes, changing the project images, and making new pages, go to the little down arrow button to the left.

Select the option to export .Zip. Make sure to give this a project name, too.
And also make sure to save your project, in case you want to tweak or move some stuff later.

Assembly will download a Zip file for you to open up. Pretty easy, right?
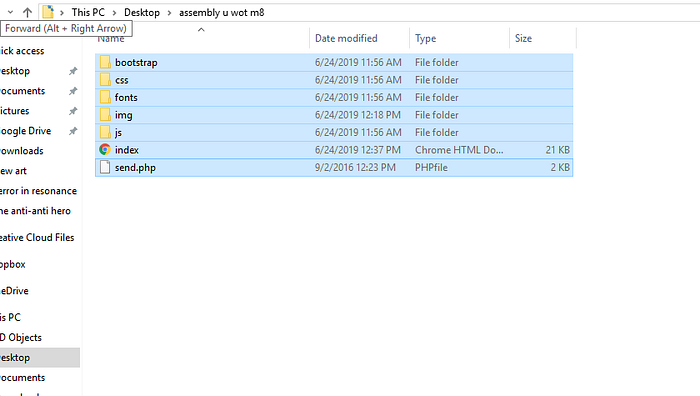
Now you can make a new folder on your desktop or wherever you want.

Drag all those files in your Zip archive into this folder.

Take a look at the folder names for a moment.
Bootstrap contains bootstrap elements.
CSS contains your stylesheets.
Img contains all the images that were exported.
Index is your website’s page (I opted to just make one page here).
JS has all the JavaScript.
Send.php is how your contact form sends emails. I suggest you use something else (like Getform, paired with Google reCAPTCHA) for your PHP form sending stuff, or else you’re going to get spam.
Once you’ve looked this over, let’s proceed to actually editing your website.
Step 5: How do I make simple changes in Assembly?
I know it’s a pain in the butt to do code-things, but trust me, this is easier than using a WordPress WYSIWYG editor.
It’s also faster.

Open up your index file in Notepad++.
Here you’re see a bunch of confusing, annoying code.

Open up the CSS folder and open up usertweak.css in Notepad++ too.
See how easy Notepad++ makes working with your code? They color-code everything so it’s super simple.
Now it’s time to open up your Index file in Chrome. You do that by right clicking on the index file, and select ‘open with chrome’.
You should have something like this:

Let’s start by changing the main logo image on the header.
I want you to right click on this element in Chrome, and hit Inspect.

This is where your logo image lives in Notepad++. Chrome Developer Tools make it easy to see where something is in your code.

Go back to Notepad++ and find where this is.

You can make changes directly here by specifying an alt tag, which is for SEO, and change the image entirely.
Now, remember that folder you had with your logo in it?
Copy and paste your logo into the img folder.

You can also just replace “against.png”, but I’m trying to teach you a bit of code here, so make the effort!

Change the picture path here, save your file, and then go back to your Assembly window and refresh the page!

Oh crap, that’s huge.
We always want to use hi-res files for logos, barring SVGs (which is a lesson for another day).
So how do we make it smaller?
Here’s the easiest way to shrink your main logo image:
A cool CSS trick is to target a parent div’s class, then an item inside that div, to make changes to how it functions.
Open up usertweak.css in Notepad++.

Now, there’s not a whole lot going on here.
That’s good — you can change stuff here.

I added in this line here:
.header-1 img {
max-width:250px;
}
I’m telling the CSS file to target the class ‘header-1’, by adding a period before it in the CSS file.
Periods denote classes, # denote IDs. Don’t worry about that for now.
I’m telling the CSS file to target the img, and saying it can only be 250px in width.
Pick a number that seems right to you, then hit save.
Refresh your Chrome tab with your exported Assembly site again.

It’s a bit too tiny, but that’s fine.
Now you know how to change your logo image, and it’s size! Whew!
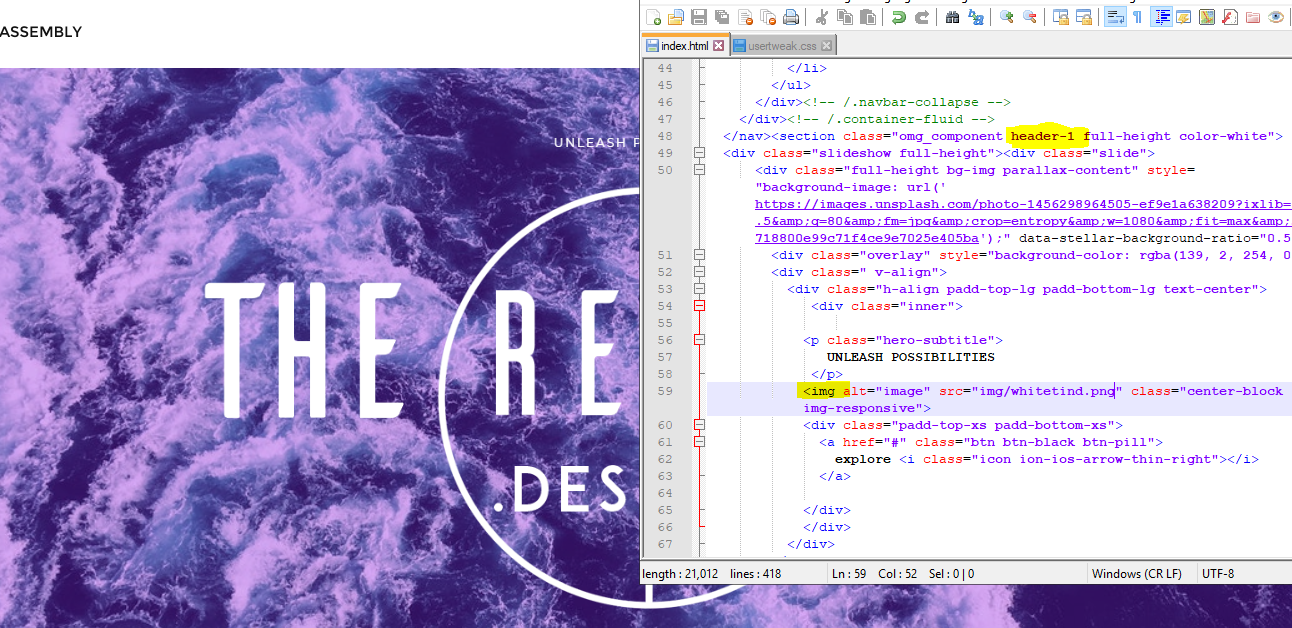
What about the header background image in Assembly?
How do I change it?
Go to Notepad++ again and check out Index once more.

This part of the code lists the background image for the header.
It’s not great form to direct-link images, so you’re going to want to download an image (try using Unsplash! It’s free).
Then you’re going to want to put it into the img folder.

Go to Index in Notepad++ again and just change the image filename.
I changed it to a random piece of art I had lying around on my desktop.
Then I saved the file, and this is what showed up:

What if I want to change how the background image is positioned?
See how it’s basically just the top of her head? We want to change that.
Go to your Assembly Index Page in Chrome, and right click on the background area, then hit inspect.

This shows me what the element is doing.
Why not play around a little bit to see if we can’t fix it?

I opted for ‘center’ instead of what Assembly already had.
Chrome Inspect gives you suggestions when you double click next to the ‘background-attachment:’ part, so play around a bit.
This doesn’t mean you’ve changed anything, however.
Copy that whole section:

Go back into Notepad++, and go to usertweak.css. Paste that bit you copied.

You don’t want “element.style” because the CSS won’t know what the heck that is.
Delete that part.

You can use something like this to change how the background image behaves:
.header-1 .bg-img{
background-image: url(img/scarletbowie.jpg);
background-position: center;
}
Make sure to place this in usertweak.css:

Now, I know the web development community is going to skin me alive, but I’m not writing this for experts. I’m writing this for noobs.
You’ll notice that the background image position did not change.
Why is that?
A different style sheet is telling the background image how to act. What a jerk!
Tell it that it’s !important to listen to you.

Your code for this element now looks like this:
.header-1 .bg-img{
background-image: url(img/scarletbowie.jpg);
background-position: center !important;
}
Hit save, and reload your index page in chrome.

Scarjo-Bowie-Alien-Synth now looks hella fly on my header image. Woot woot!
You can now make little changes like this in Notepad++.
Simple things like making sure an image doesn’t get too big, or positioning a background image in a certain way, are no big deal for you now!
For a primer on CSS, if you’re feeling excited about it, check out this nifty guide by someone way cooler than me.
How do I change text in Notepad++ for my Assembly Site?
Well, first you figure out what you want to change…
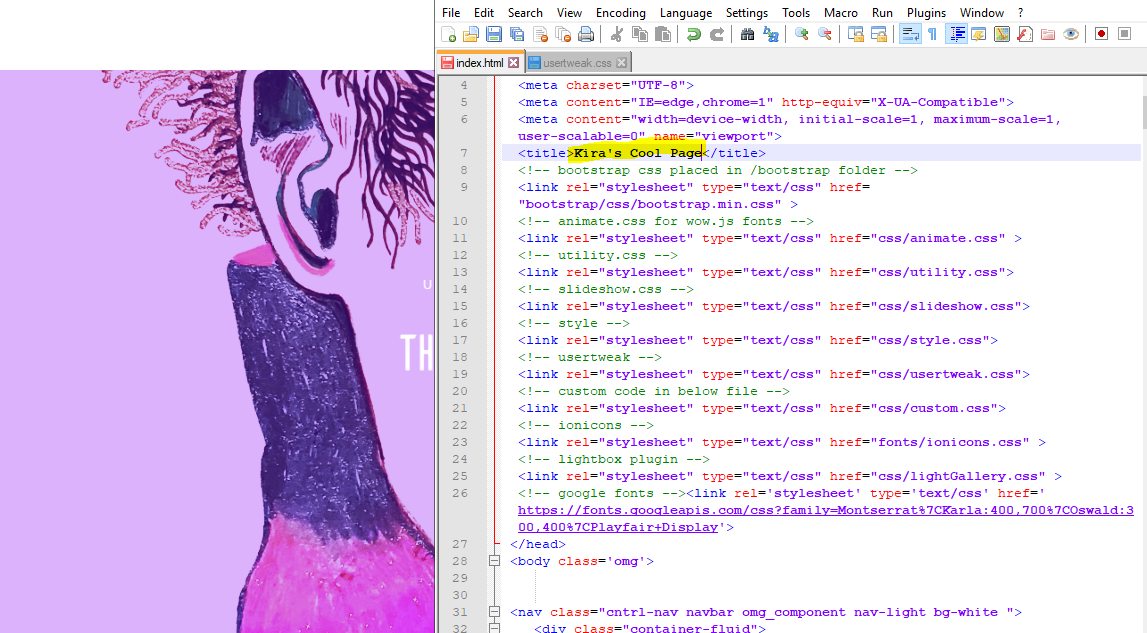
My title isn’t just “My Title”. I want to name it Kira’s Cool Page, so I did.

I also don’t like UNLEASH POSSIBILITIES. So I changed it to something else:

That’s a Star Trek Deep Space 9 reference, for all you nerds out there.
I also don’t like this Lorem Ipsum crap. So I changed it.


Now it’s time to hit save!


I just changed a bunch of text. Pretty simple, right?
Why don’t you go through and change the text and pictures now?
Take your time, pick out some great pictures, and place your copy.
When you’re all set, save it, and come back here.
How do I change the links in the menu?
It’s not hard, let’s do this!

The links live in the Index page. In Notepad++ find where it says ‘Link’ and change it to…whatever it is you want.
See the <a href=”#”…. part?
Change the # to something else. It can be a page on your site, it can be an external link, and it can even go down the page to your contact form.
Wanting a link to go down the page is wanting an anchor link.
How do I make an anchor link?

Change the link to #something. Pick anything, it really doesn’t matter, but you need to make sure you know where it goes.
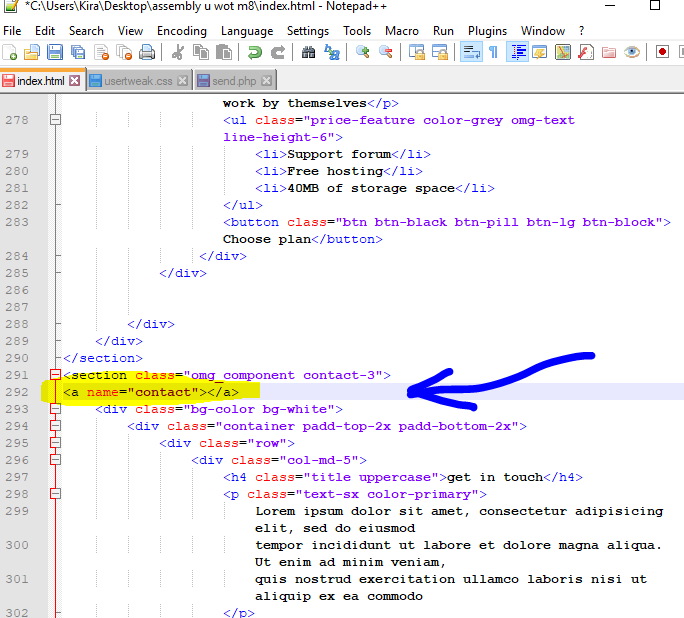
Find the section you want to link to, and add this code:
<a name=”contact”></a>
Here it is in action:
Save your index file!

Your link has now changed. When you click it, it will go down here:

Oh, but that was jumpy…how do you fix it?
Add this code to usertweak:
html {
scroll-behavior: smooth;
}
This is telling the entire HTML page to have nice smooth scrolling behavior.
So it looks pretty and isn’t janky as heck.

Now when you click anchor tags that pull you down the page, they won’t be so jumpy! Woohoo!
How do I set up my contact form in Assembly?
You need to tweak it a little bit.
Go back to the main Assembly folder thing for your exported website.

Keep in mind I’m getting a shitload of spam from this type of contact form, so you’re going to probably want to go with something else.
Typeform is free and comes with a little embed code you can swap out the contact form on your page for.
I prefer GetForm, since it’s super easy to set up reCAPTCHA and doesn’t require me to replace my entire form (on the html page) altogether.
If you have questions about how to do this, set up a consultation and I’ll walk you through it.
If you’re just mucking around with the form, do this:

Replace the highlighted parts with what the ‘sender email’ will be.
As in, if you get an email from the form, what that is.
And then where the ‘receiver email’ should be.
As in, where that email will go.

Also change the subject line too.
Step 6: Okay, I’ve made my changes, now what?
I can’t exactly walk you through logging into your ftp account or how to get that information because I don’t know who / what your host is, but this is what I do.
Windows can natively connect to an ftp account.
I know it’s bad practice, but…I don’t care for my own stuff. Sorry, y’all.
If you’re particular, get an FTP client.
Otherwise, login to your FTP via explorer.
Usually it’s ‘ftp.blahblah.com’, and then you put in your username and password.
Now make a new folder in your root directory if you don’t want to overwrite stuff.
Or just go to the next step and drag everything into the root folder.

Open your website folder that you made for your assembly export on your desktop…
Select all this crap.
Then drag it into the ftp folder you made.

It might take a little bit.

Now go check out your website.
Also halt WAMP because you’re done messing around.
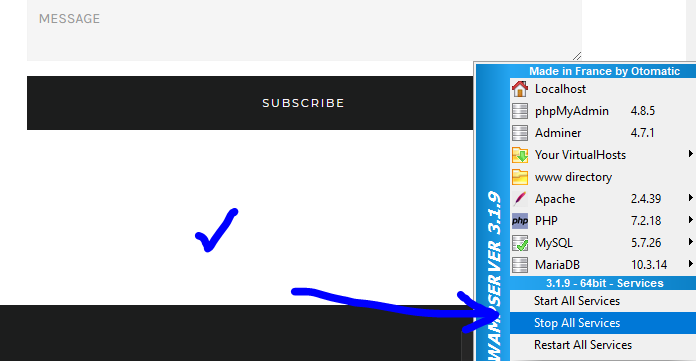

Your new website is live! Holy shit!
Now that you know how to change stuff, you can go on to make your website even better:


Building a site in Assembly didn’t take me 45 minutes!!!
Scam! Hack! Warble Glarble!!11
I have enough experience under my belt to make swift changes. Contrary to whatever bad practices I’m spinning above, I’m pretty sold with front-end, so obviously it took me less time than 45 minutes.
But inherently this should not take you forever. Assembly assembles all the parts you need, really super fast, and then all you need to do is change stuff more to your liking.
If you’re taking longer than that, or you’re stuck, reach out for a consultation and I’ll help you figure it out.
For quick tips, hit up the comments below and I’ll do my best to give you bits of advice.
I hope this helped!
Kira Leigh is a snarky marketing nerd, anime / gaming writer, and artist. See her work here and send her a message if you want to work together.
Special thanks to Renato P. dos Santos for his continued support.

