How to Set Up Your Development Environment with VirtualBox

Setting up a virtual environment is an extremely helpful and important step to becoming a developer. You might be asking yourself why you need this because you can run and write all your code in your current computer. However, when you run anything on your computer, you’re always at risk of things not going as expected. As a beginner, the risk is higher because you will be looking at tutorials online without knowing if they’re trustworthy. With a virtual machine, you are able to run anything on it without endangering your host machine.
In this tutorial, I will show you how to download and install VirtualBox, as well as how to create a virtual machine. Next, I will show you how to install Ubuntu 18.04 and how to download the Guest Additions package. When you’re done, you will have a working VM ready for your programming endeavors!
Downloading and Configuring VirtualBox
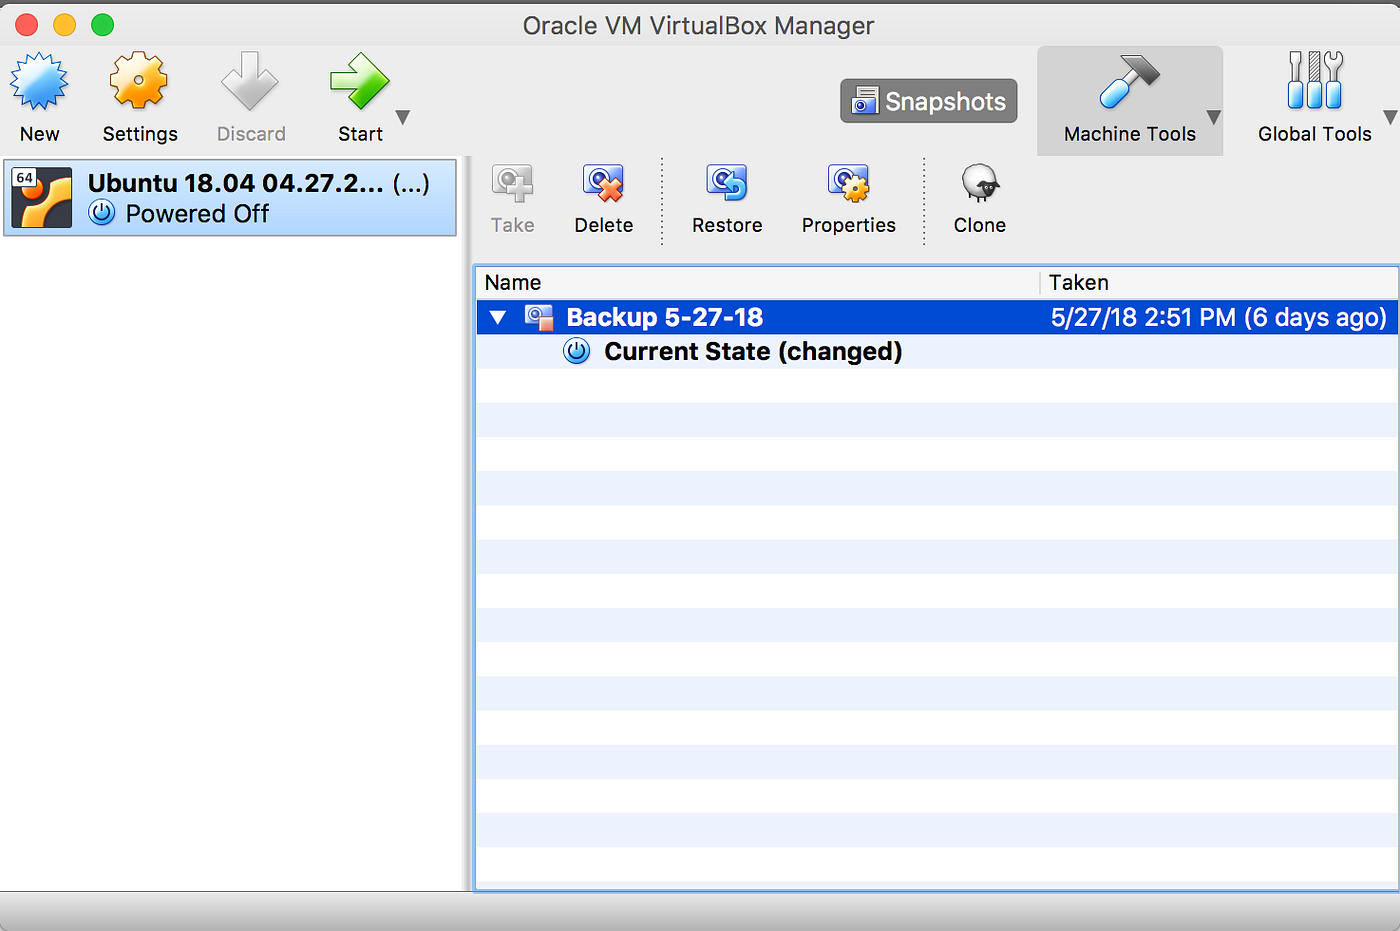
To begin, you are going to download Virtual Box on your computer. After you click the link, follow the instructions for the download and installation process. When installing, use the prompted default settings. Eventually, you will end up with the VirtualBox home screen looking something like this (ignore the machine displayed on the left and the backups on the right, you will get to these eventually):
Now that you have VirtualBox downloaded, you are going to create your first virtual machine. To start, click the “New” button on the top left corner.

In this screen, you will name and choose an operating system for your virtual machine. Eventually, you will have many virtual machines, so make sure you give it a name that accurately describes its purpose. For example, since I am learning Python, I’ll name it “Python Practice”.
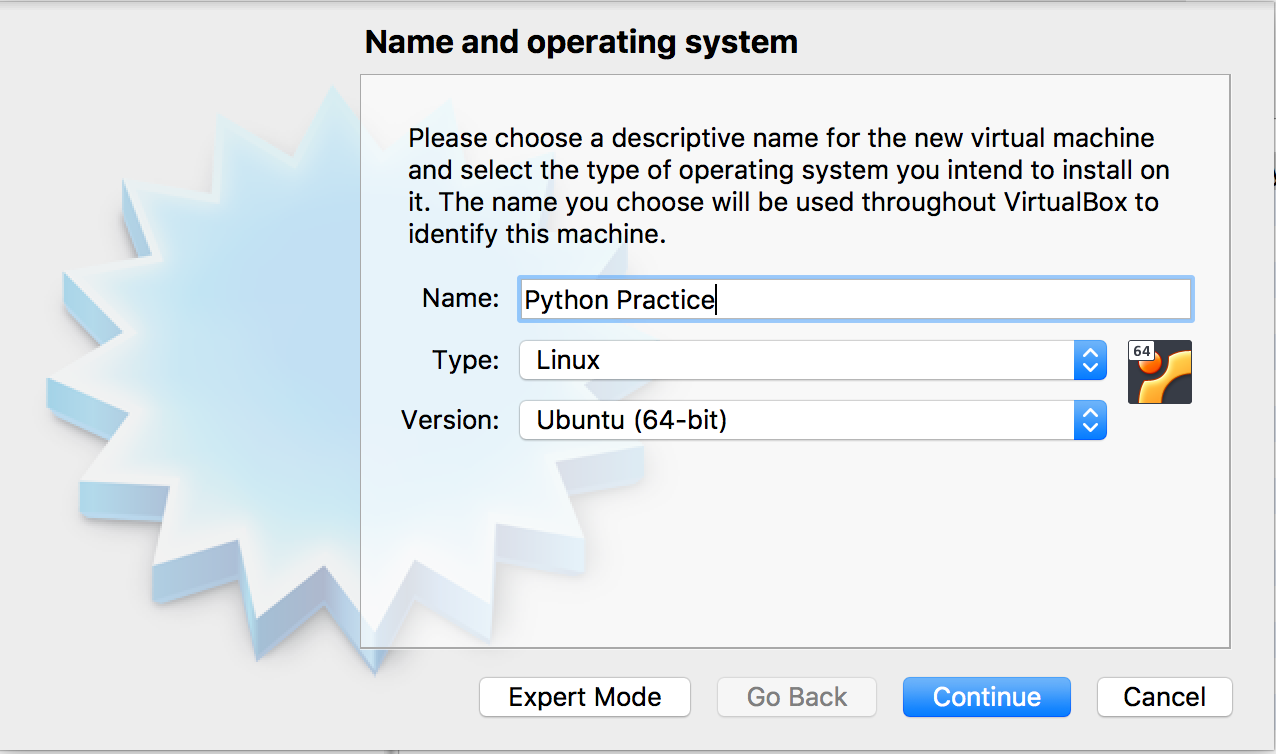
Next, you will chose an operating system. For this tutorial, you will be using Linux as your operating system with Ubuntu(64-bit).
Ubuntu is one of the most popular Linux operating systems because it’s free and open-source (benefits of Ubuntu are thoroughly explained in this article). If you wanted to use Windows instead, you’d have to pay for it. As a beginner, you might be unfamiliar with the “open-source” term. Basically, there are two types of software: open-source and proprietary. Open-source software has code that can be viewed and modified. Reading the source code is an advantage because it helps you know what you can or can’t do with this specific software. In addition, if you wanted to change something, you could! To expand on this, if there’s a bug, people can file reports and work together to solve the issue faster and improve the software with new updates. If you want to learn more about this topic, check out this article!
Now that you understand a bit more about software, let’s move on to the next step by clicking “Continue”.
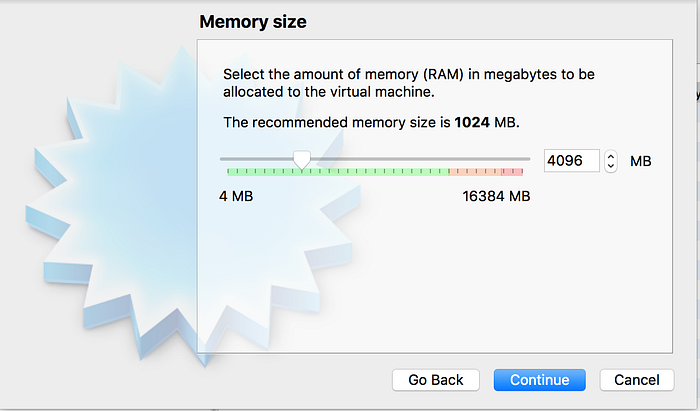
It’s time to select the amount of memory (RAM) you’d like to give your virtual machine. First, RAM stands for Random Access Memory. RAM allows information or values to be stored and retrieved in your computer. For example, whenever you open Chrome, your computer uses RAM to store the data used in your browser. However, when you close the tab, free space will open up in your memory because it was only storing it temporarily. The more memory your computer has, the faster your it will process information and the better performance you’ll have. To read more on RAM, check out this article! For this virtual machine, you will choose 4096 MB.
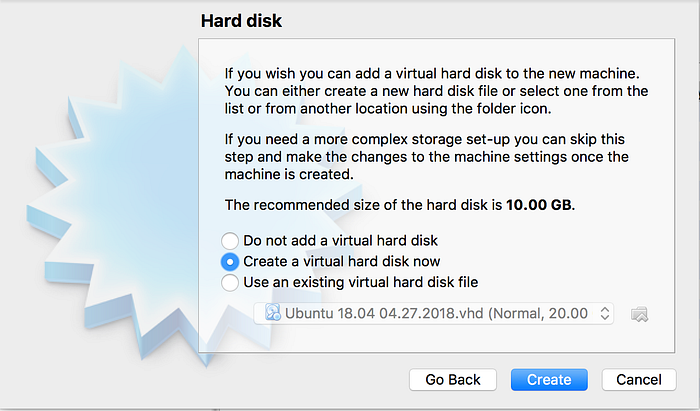
Now you will create a virtual hard disk. The hard disk is the storage used to actually save files in your computer. In a later step, you will choose a size for your hard disk.
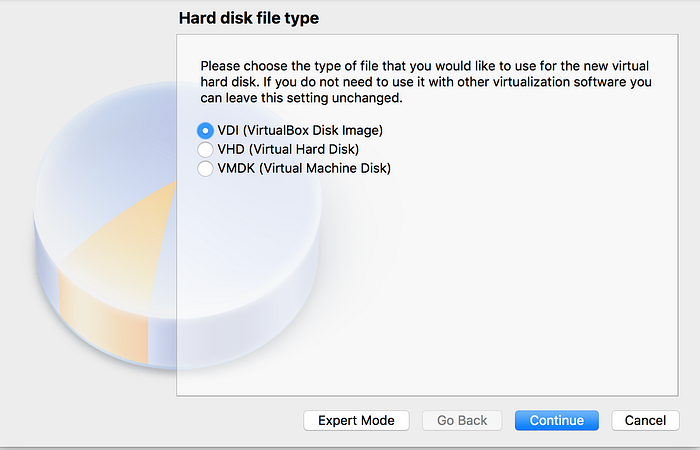
VDI stands for Virtual Disk Image and it is the preferred setting for VirtualBox.

Now, you have to choose between Dynamically allocated or Fixed size hard disk file. Dynamically allocated means that if you choose to give the virtual machine 20 GB of hard disk space, it will progressively use the space as you need it, with a maximum of 20 GB. Fixed size means that it will take the 20 GB from the start, even if you’re not using all of it at that moment. The dynamic option is slower, but for this virtual machine it is a better option because you don’t really need all that space for now.
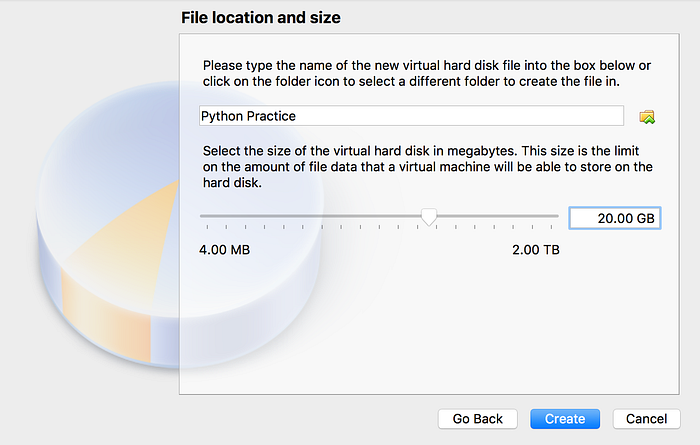
For this step, name the hard disk and let it save in the default location. Something to note, this screen will first appear with 10 GB as default. The input box is a little buggy when changing the size, so when it says 10, highlight the 1 and change it into a 2 because otherwise it won’t let you edit it. Also, you are choosing 20 GB to have enough space on the VM to save your files. When you’re done, click “Create”.
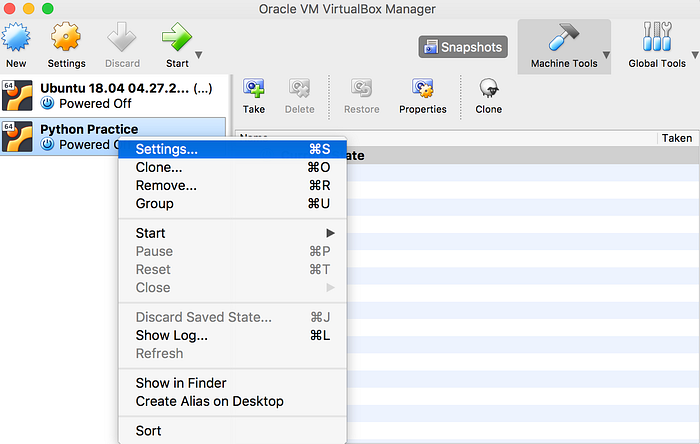
Now that you have created your machine, it will appear on the left side of the VM home screen. Next step is choosing Ubuntu for your VM. First, right click on your virtual machine and click “Settings”.

This screen should pop up, now click on the CD icon next to “IDE Secondary Master”.
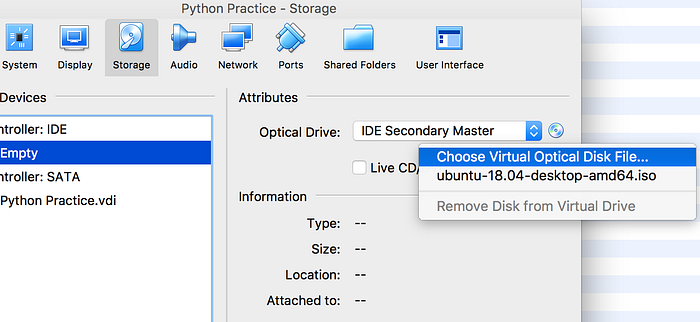
Click on Choose Virtual Optical Disk File. Here, VirtualBox telling you that you have created a blank VM and it wants you to choose an operating system to run on your VM.
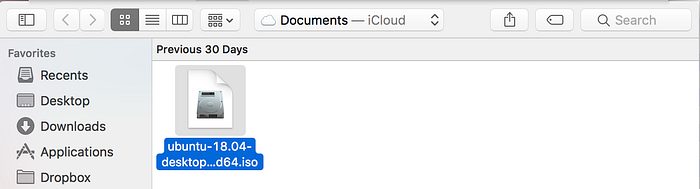
Ubuntu should come up first in your files, choose this one. Then click “OK” to save the changes you made.
Installing Ubuntu 18.04
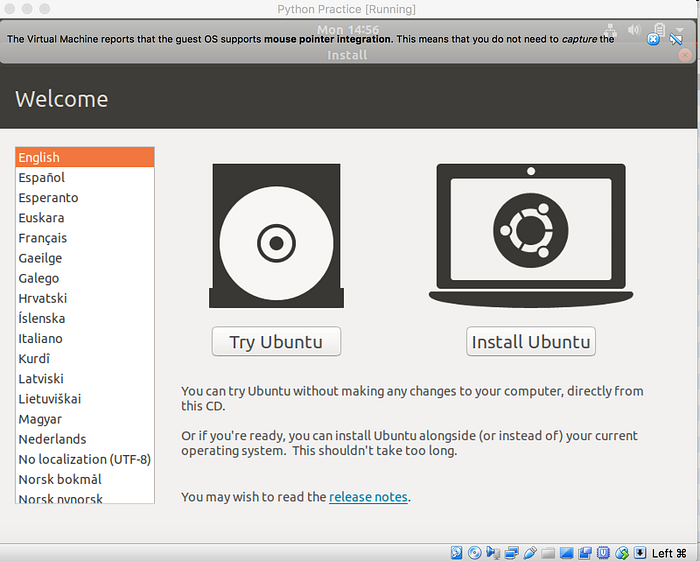
When you first open the VM it should prompt you to install Ubuntu on your virtual machine, click “Install Ubuntu”.
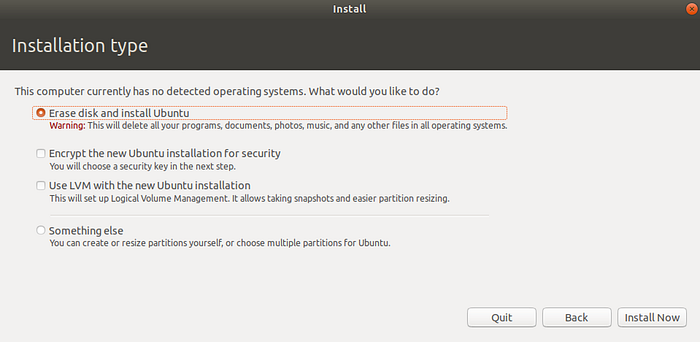
Next, you will choose “Erase disk and install Ubuntu”. If you had an actual disk drive, this step would delete everything on it to install Ubuntu instead. The disk drive it’s talking about right now, however, is empty because it is the VDI that you just created. After choosing the first option, click “Install Now”.
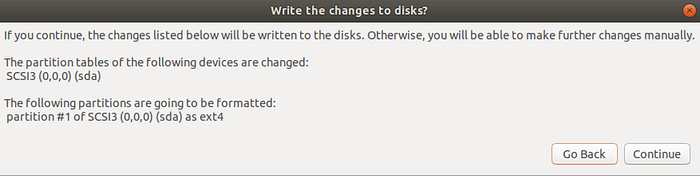
Click “Continue”.
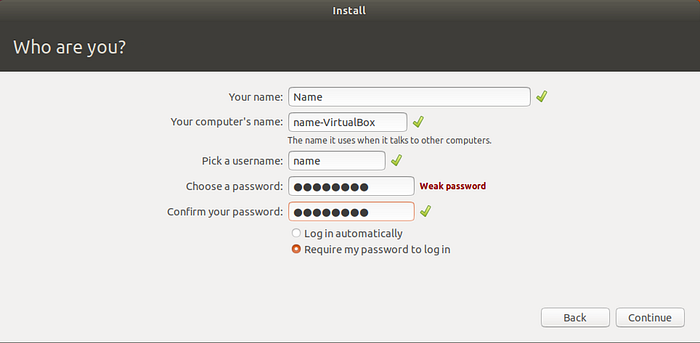
In this screen, just write your preferred name, username, and password for your new VM, then click “Continue”.
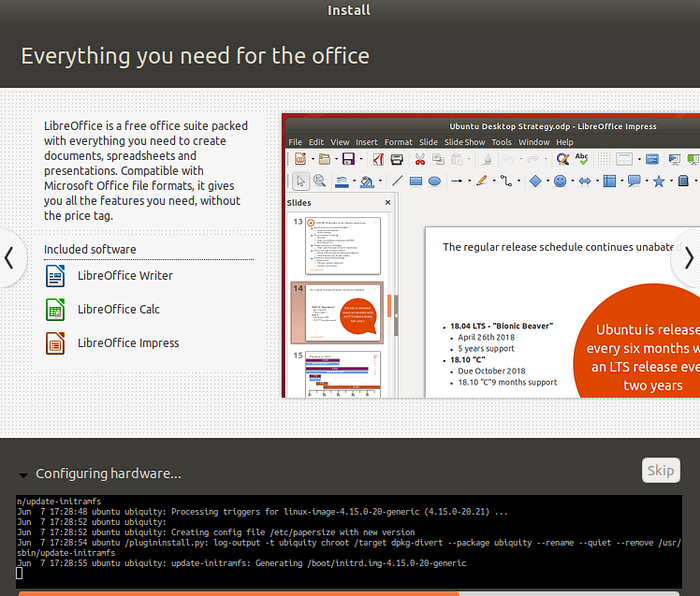
Now, you will have this installation screen for a while. This is installing Ubuntu in your VM and will take around 15 minutes.

Finally the installation is complete and you have to restart the VM to finish.
Installing Atom
Now that you have Ubuntu installed, you can explore around the desktop and get familiar with it. However, before you can start developing, you will need a text editor. There are many to choose from and if you want to read about some of the most popular ones, check out this article. For this tutorial, I will focus on Atom, but you can choose whichever best fits your needs.
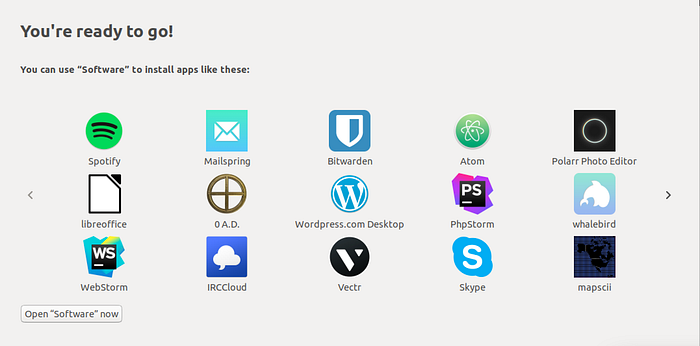
After the installation is done, Ubuntu will open up with a tiny tutorial showing what you can download, etc. In this screen you will click “Atom”.
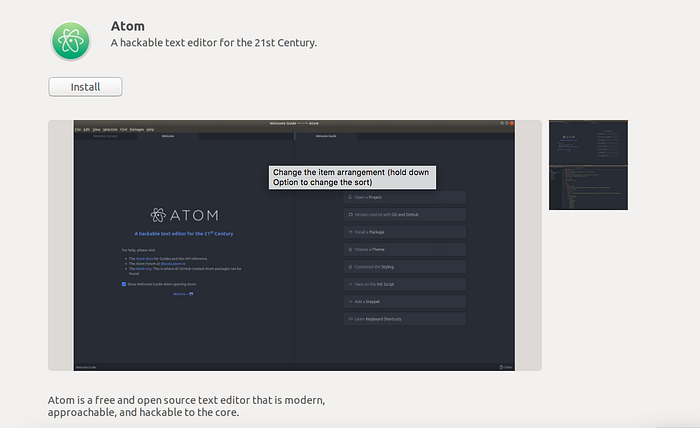
Next, click “Install”.

After it finishes downloading and installing, click “Launch”. Atom should finally open up!
Installing The Guest Additions Package
One of the final steps for your VM is installing the VirtualBox Guest Additions Package. This allows you to have all the features of VirtualBox such as bidirectional copy and paste. This lets you copy/paste from your VM to your host machine and vise versa.
To start, you will open Terminal.
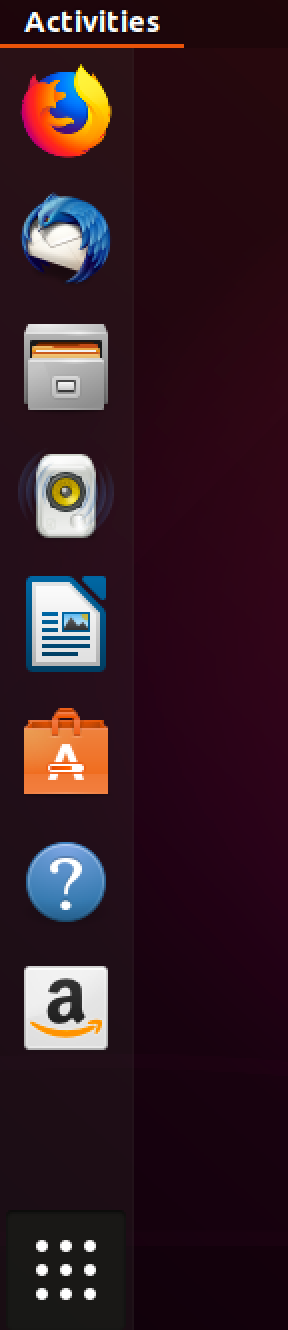
On the left hand side of your desktop, click the item at the bottom with the dots.
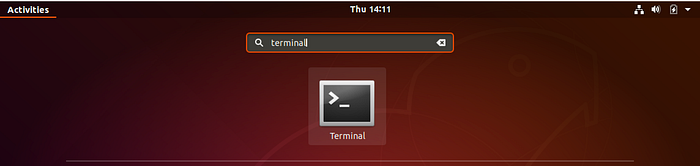
This should open up a search bar, in which you can type “Terminal” and click this icon.
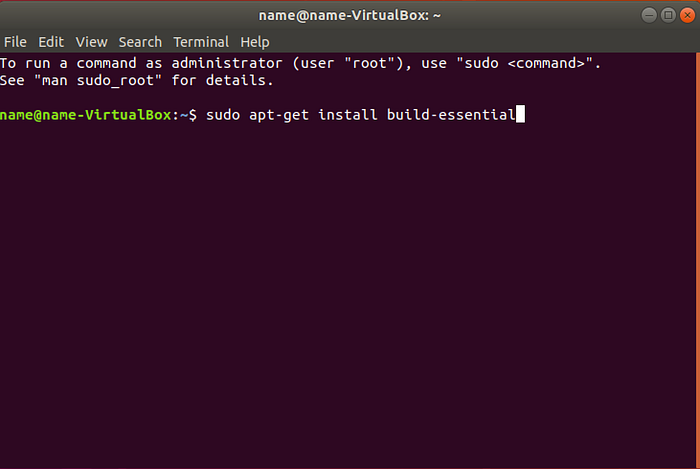
Input these commands into Terminal and click enter. As for what these commands mean:
“Sudo” is a command used in Linux operating systems that allow you to run commands with privileges as a root user. If you want to read more, read this article for beginners! Next, “apt-get install <package name>” is used to install packages. APT stands for Advanced Package Tool. In the command above, you wrote the exact same and replaced the package name with “build-essential”. To learn more about apt-get commands, read this article.
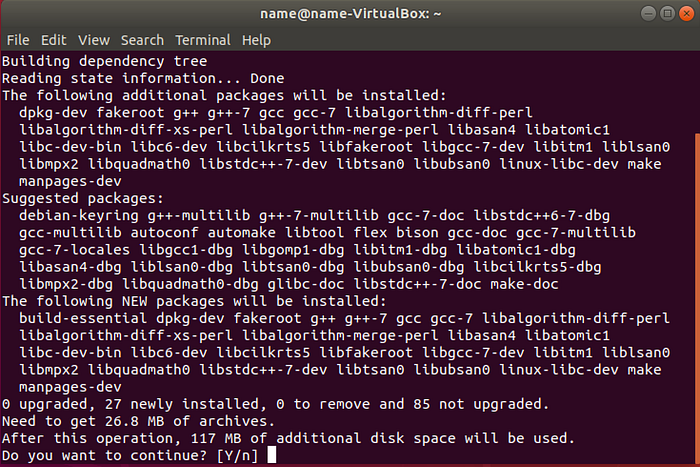
This screen asks you to confirm that 117 MB of disk space will be used and if you want to continue. Type in “Y” and press enter.
Finally, you are going to install Guest Additions. If you go back to your desktop screen and go to the top of the VM menu. You should see the different options: “VirtualBox VM”, “Machine”, “View”, “Input”, “Devices”, “Window”, and “Help”. Click “Devices” and select the last option “Insert Guest Additions CD Image”.

Click “Run”.
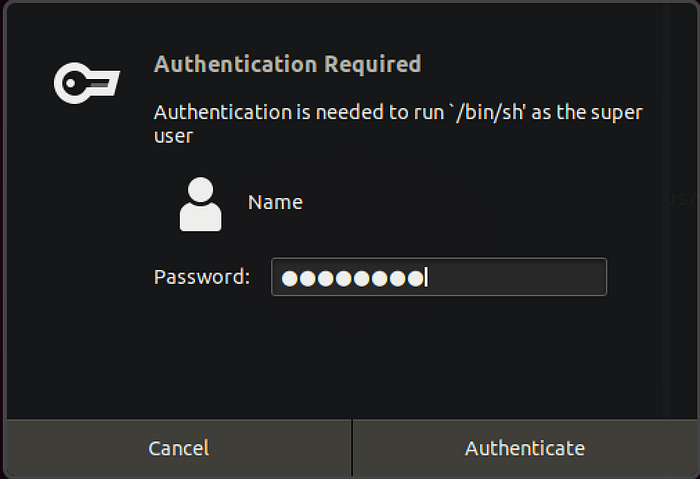
Type in your password and click “Authenticate”.
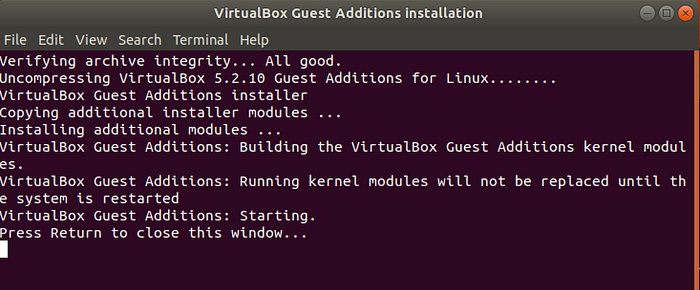
You have now finished installing the Guest Additions package! Click enter and this window will close.
Make sure to restart your machine so the Guest Additions Package is properly loaded.
Lastly, if you click on “Devices” at the top again, choose “Shared Clipboard”, and select “Bidirectional”, it should now allow you to copy/paste from your VM to your host machine and vice-versa.
After this, you are done! You now have a VM to work on all your programming for now. Whenever you start working on something new, you might need a different type of VM and now you can create as many as you need.
Now that you have finished setting up your development environment, here’s the link for the article on Chapter 1 of Python Programming for Absolute Beginners.
Thanks for reading! :)